TI WooCommerce Wishlist
General Settings
In “General Settings” section you can set Default Wishlist name and privacy, allow/deny guests to create wishlists, enable/disable multiple wishlists for users, manage “Follow” functionality, apply Wishlist pages, set how products will be removed from wishlists.
1. General Settings
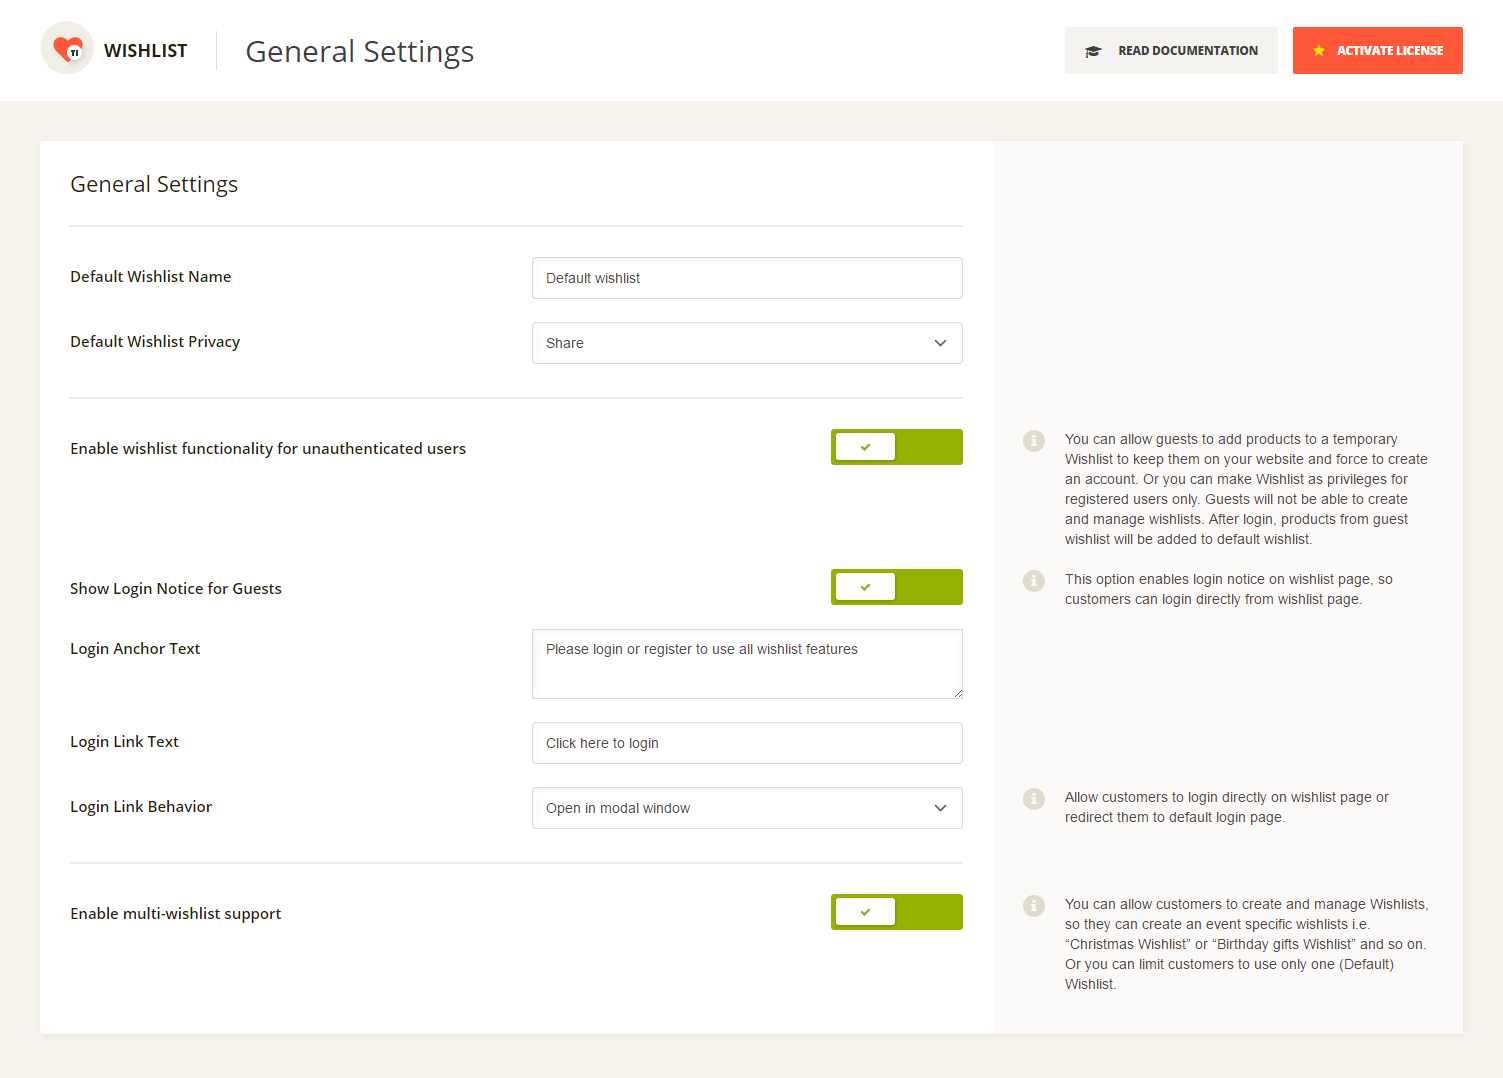
Default Wishlist Name – here you can set what wishlist name the users will see by default. (See #1 on a screenshot below).
Default Wishlist Privacy – here you can set whether Default Wishlist will be public (all users can see it and it’s also available for search), private (only the user who created it will be allowed too see it) or shared (not visible in search results but anyone who has a link to it, can view the wishlist).
Enable wishlist functionality for unauthenticated users – you can allow guests to add products to a temporary Wishlist to keep them on your website and force to create an account. Or you can make Wishlist as privileges for registered users only. Guests will not be able to create and manage wishlists. After login, products from guest wishlist will be added to default wishlist.
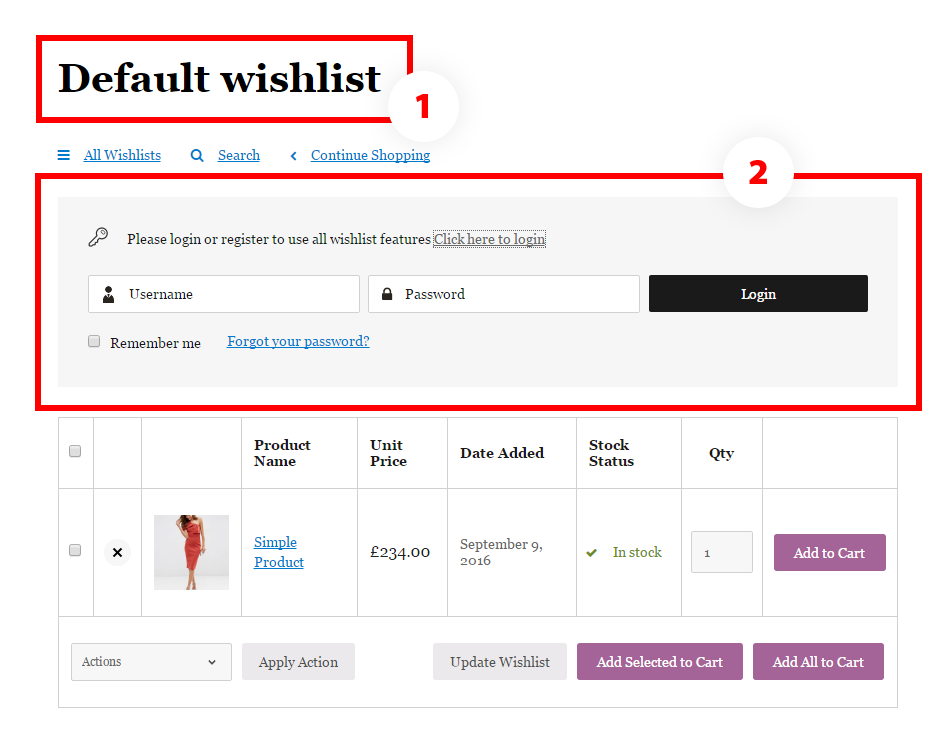
Show Login Notice for Guests – this option enables login notice on wishlist page, so customers can login directly from wishlist page.(See #2 on a screenshot below)
Login Anchor Text & Login Link Text – in these fields you can add custom text for login notice and a link.
Login Link Behavior – allows you to set whether your users will be redirected to a login/register page or a login form will appear directly on a Wishlist page.
Enable multi-wishlist support – you can allow customers to create and manage Wishlists, so they can create an event specific wishlists i.e. “Christmas Wishlist” or “Birthday gifts Wishlist” and so on. Or you can limit customers to use only one (Default) Wishlist.
2. Follow Wishlist
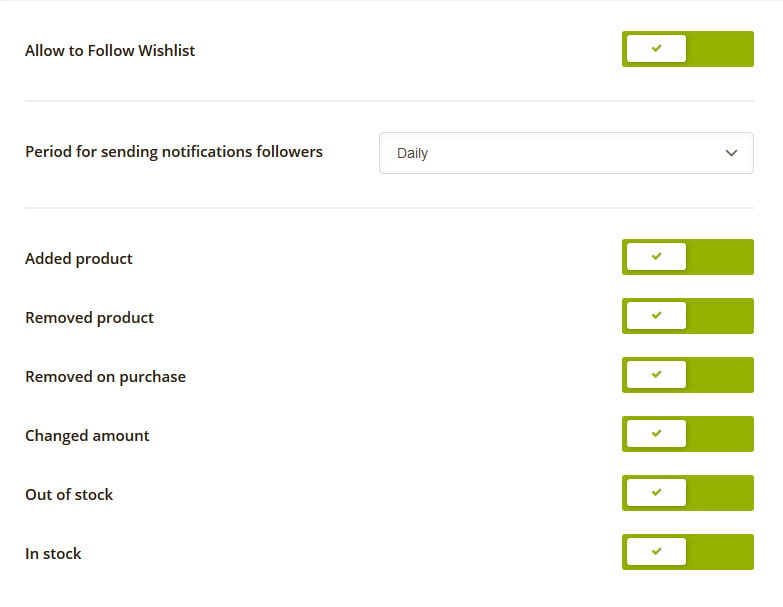
Allow to Follow Wishlist – this option adds Follow button to Wishlist page bellow the table and allows users to receive email notifications each time Wishlist owner make changes in his Wishlist. (See a screenshot below)
Period for sending notifications followers – you can control how often followers will be receiving email notifications about changes in Wishlists that they follow. However, they will not receive any notifications if no changes were made in wishlist, within selected period of time.
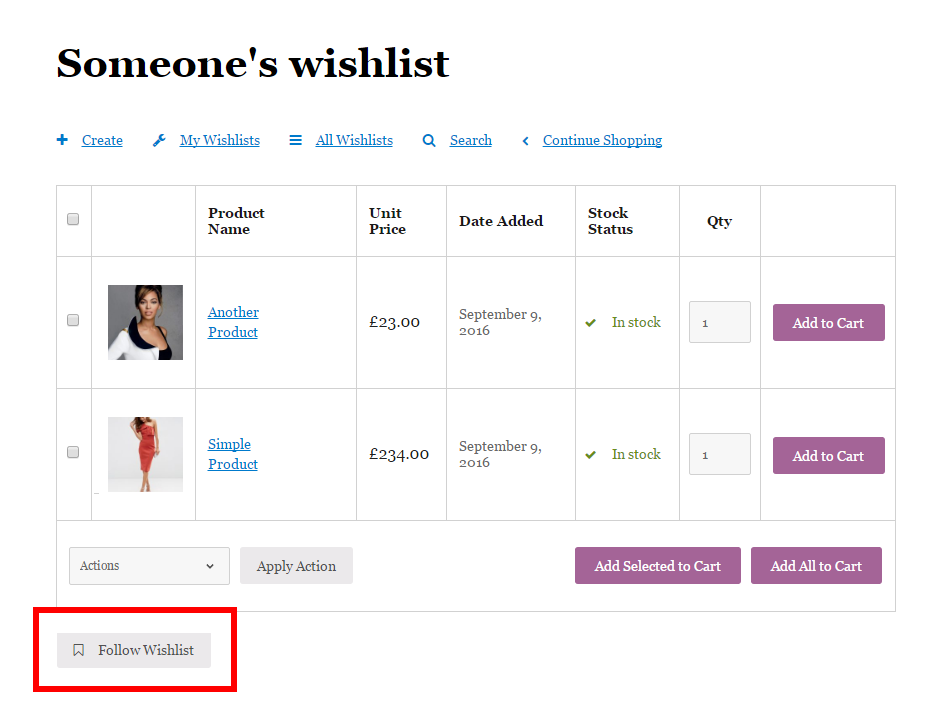
“Follow Wishlist” button can be found on a users Wishlist page below the table if a Wishlist status is “Public” or you have received a link to it.
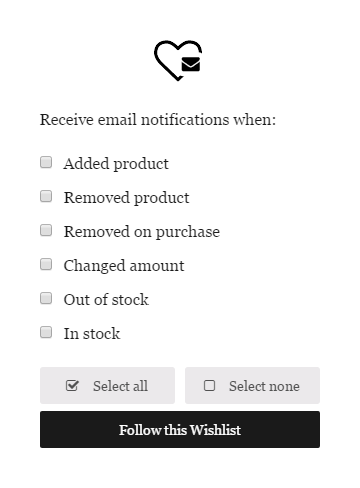
Choose what kind of Wishlist events users can follow. Users will have a choice from enabled options. (See a screenshot above)
Added product – the user will receive notification if the product is added into wishlist.
Removed product – the user will receive notification if the product is removed from wishlist.
Removed on purchase – the user will receive notification if the product is removed from wishlist (available if automatic removal option is enabled).
Changed amount – the user will receive notification if the quantity of products is changed in wishlist.
Out of stock – the user will receive notification if the product is sold wishlist.
In stock – the user will receive notification if the product becomes in stock.
Once you click the button a popup with following options will appear (see a screenshot below). You can manage what events users can follow using these options. So, if you disable some of them, they will be also removed from Follow Popup window.
At least 1 condition when the email will be sent should be applied, otherwise you won’t be able to follow Wishlist.
3. Wishlist Page Options
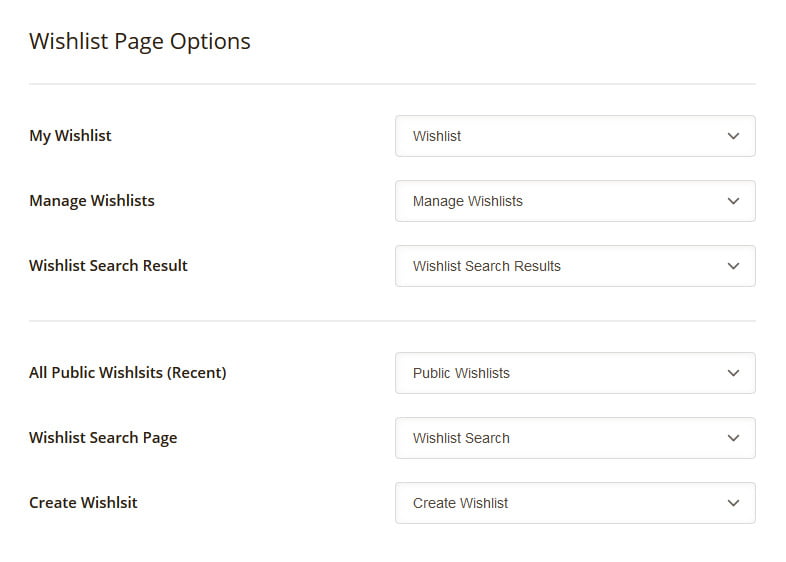
Following pages should be selected, so the Wishlist “knows” where they are. Basically they should be created during Setup Wizard automatically, but if not you can always create them manually.
All you need is to create several pages under the Pages section in WordPress dashboard, add Wishlist Page Shortcodes that you can find below and apply these pages in a Wishlist Page Options settings.
4. Page Shortcodes
My Wishlist – on this page the user will see the products added into a default wishlist.
Shortcode: [ti_wishlistsview]
Manage Wishlists – on this page page the user will see the list of wishlists with the ability to edit/delete them if “Multi-wishlist support” option is enabled under the General Settings, otherwise the user will be redirected to a page with default wishlist.
Shortcode: [ti_wishlists_manage_lists]
Wishlist Search Results – on this page the user can see public wishlists filtered by the user name or e-mail address.
Shortcode: [ti_wishlists_search]
You can also set additional (not necessarily) pages to show in quick menu on a Wishlist page. The links will appear below or above the table and can be managed in a Table Options -> Navigation Buttons settings. These are simple pages with search and recent wishlist shortcodes, so you can add any additional content besides these shortcodes by simply editing a page.
Public Wishlists – on this page the user can view a list of all recent public wishlists.
Shortcode: [ti_wishlists_recent]
Wishlist Search – on this page the user can search for wishlists by the user name or e-mail address.
Shortcode: [ti_wishlists_search]
Create Wishlist – on this page the user can create and manage additional wishlists only if “Multi-wishlist support” option is enabled.
Shortcode: [ti_wishlists_create]
5. Wishlist Processing Options
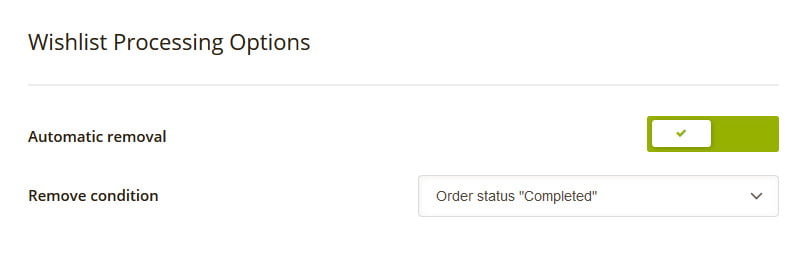
These options allow you to set products to be automatically or manually removed from a Wishlist and under what conditions.
Automatic removal – if this option is enabled, the product will be automatically removed from the users Wishlist.
Remove condition – allows you to choose when the product will be removed from wishlist.