TI WooCommerce Wishlist
Button Settings
In “Button Options” section you can manage the look and position of the “Add to Wishlist” button in catalog or single product page.
1. Product page “Add to Wishlist” Button Settings

Button position – allows you to set position of the “Add to Wishlist” button on a single product page.
*If you choose “Custom Position with code” option, you will have the ability to add the “Add to Wishlist” button using the shortcode anywhere in a product content section. You can also put this shortcode at any page/post of your website. (See the shortcode below)
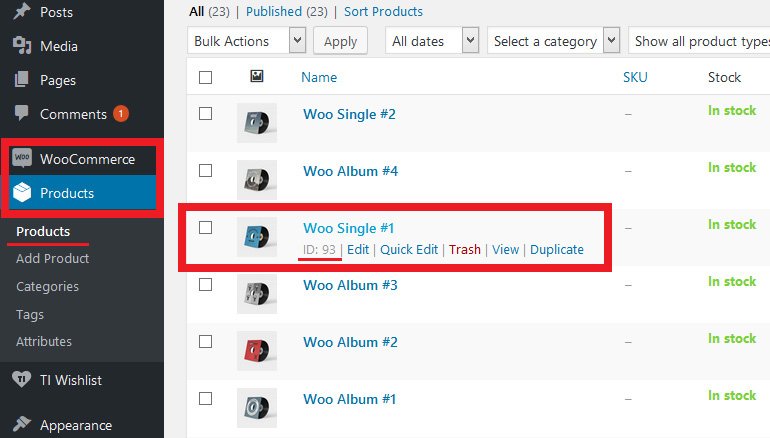
Shortcode: [ti_wishlists_addtowishlist product_id="93" variation_id="0"]
*Where product_id is the actual product ID that you can find by hovering the product title on a products listing page in your admin panel. (See a screenshot below)
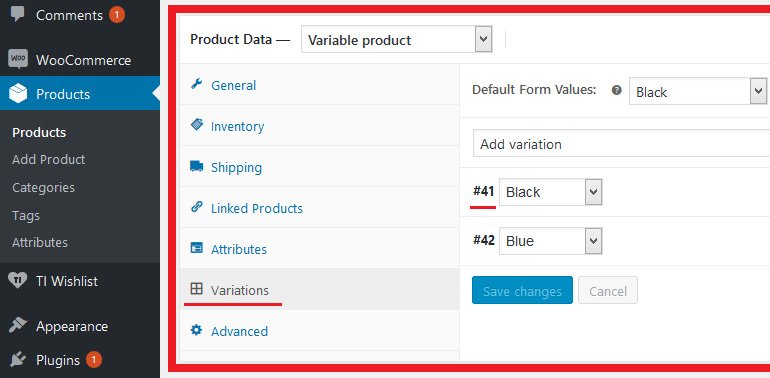
variation_id you can find while managing the variable product directly. You can see it in a “Product Data” metabox below the editor by switching to Variations tab. (See a screenshot below)
Button type – option applies how “Add to Wishlist” will be displayed as a button or a link.
*Depending on what button type you choose (a link or a button) you can customize the look (background, link, text colors, font size, etc.) in a TI Style Options -> Add to Wishlist Product Page Button section.
Note: these changes you can make only if “Use Theme Styles” option is disabled.
“Add to Wishlist” Icon Color – allows you to choose whether the icon will be white or dark.
“Add to Wishlist” Icon – here you can enable/disable the icon before the “Add to Wishlist” button or even upload your custom icon.
Icon dimensions are fixed 16×16 px. Using the icons with larger dimensions may require additional styling to fit the button.
“Add to Wishlist” button Text – here you can put your custom text for the button.
* Below you can see images with sample button options variations in admin panel and on frontend.
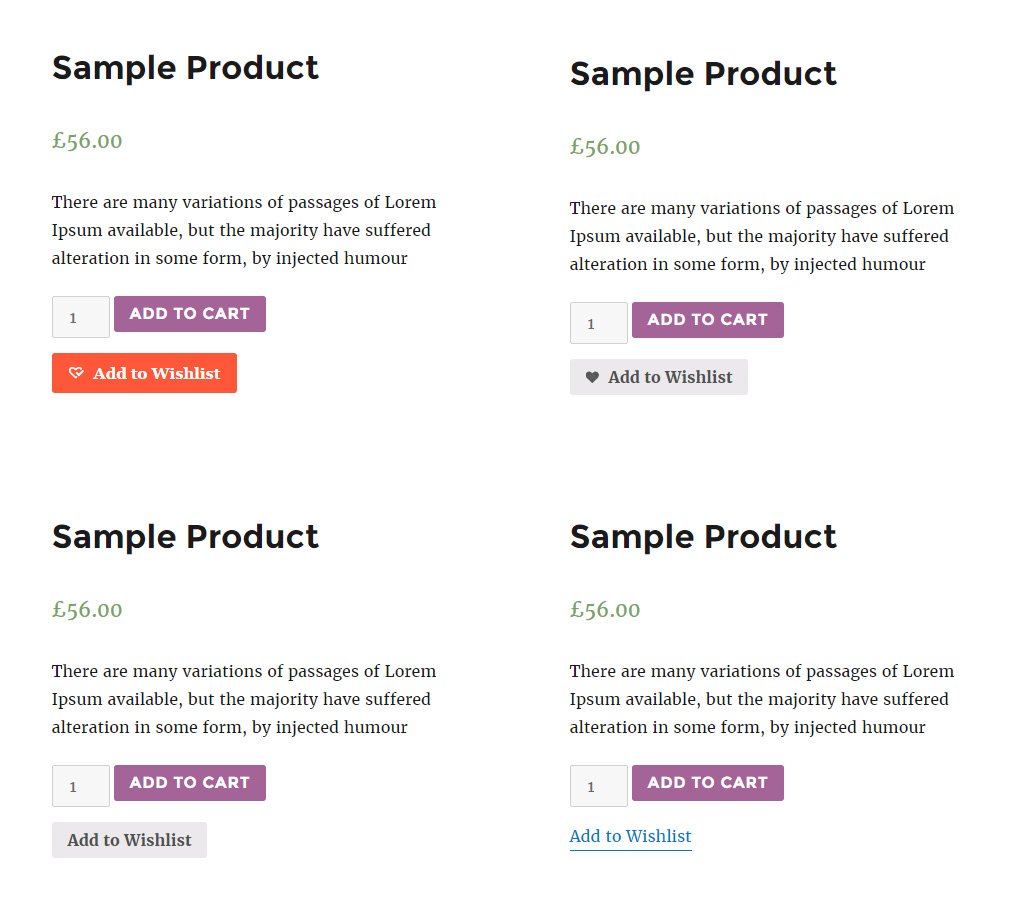
* The look of “Add to Wishlist” button on frontend with different settings
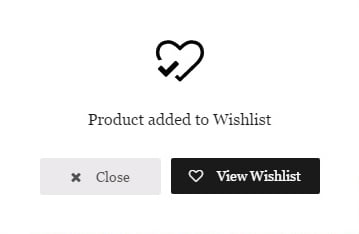
“View Wishlist” button Text – here you can put your custom text for the button that will be displayed in a popup after adding the product into a Wishlist. (See #2 on the screenshot above)
Redirect to Wishlist – if this option is enabled, you will be redirected to a Wishlist page after the product was added in 5 seconds.
“Product already in Wishlist” Text – this notification will be shown in a popup if user tries to add a product that is already in a Wishlist when the quantity on a Wishlist page is disabled. (See #3 on the screenshot above)
“Product added to Wishlist” Text – this notification will be shown in a popup after a product successfully added into a Wishlist. (See #1 on the screenshot above)
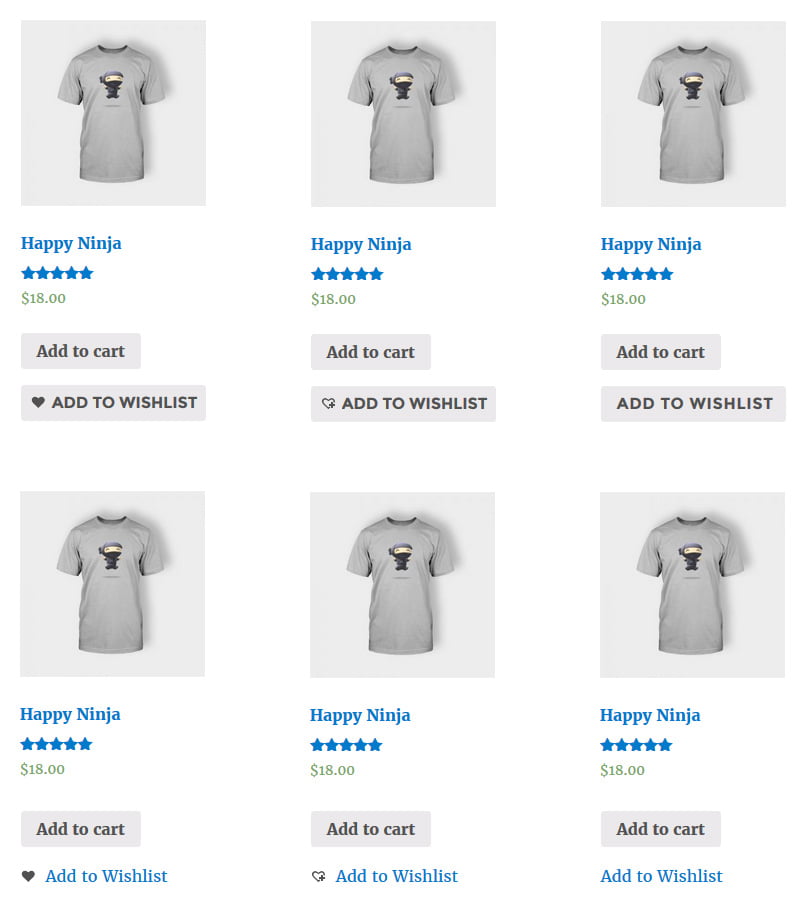
2. Catalog Button
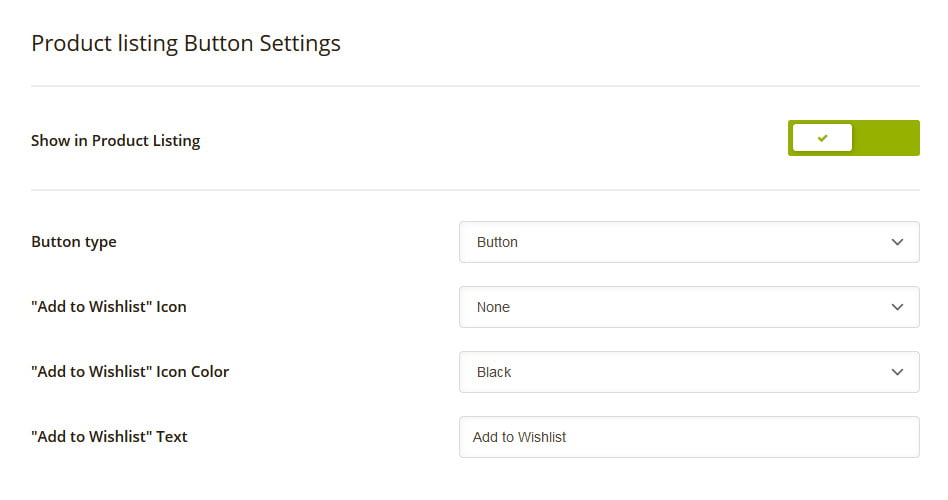
Show in Product Listing – enables/disables the “Add to wishlist” button in a catalog.
Button type – option applies how “Add to Wishlist” will be displayed as a button or a link.
*Depending on what button type you choose (a link or a button) you can customize the look (background, link, text colors, font size, etc.) in a TI Style Options -> Add to Wishlist Catalog Button section.
Note: these changes you can make only if “Use Theme Styles” option is disabled.
“Add to Wishlist” Icon – here you can enable/disable the icon before the “Add to Wishlist” button or even upload your custom icon.
Icon dimensions are fixed 16×16 px. Using the icons with larger dimensions may require additional styling to fit the button.
“Add to Wishlist” Icon Color – allows you to choose whether the icon will be white or dark.
“Add to Wishlist” button Text – here you can put your custom text for the button.
* Below you can see examples of add to wishlist button with different options set in admin panel.