1. Installation
There are several ways to install TI WooCommerce Wishlist plugin:
1. From WordPress admin panel:
Go to “Plugins” > “Add New” and search for “TI WooCommerce Wishlist”
Press “Install Now” button for the “TI WooCommerce Wishlist” plugin
After the installation is complete click “Activate” link (Plugins > Installed Plugins).
2. Install manually using FTP method.
Download the plugin
Upload the plugin folder into /wp-content/plugins directory of your wordpress installation using your favourite FTP client.
Navigate to “Plugins” > “Installed Plugins” section in your dashboard and activate the plugin.
3. Install manually from WordPress admin panel
Download the plugin
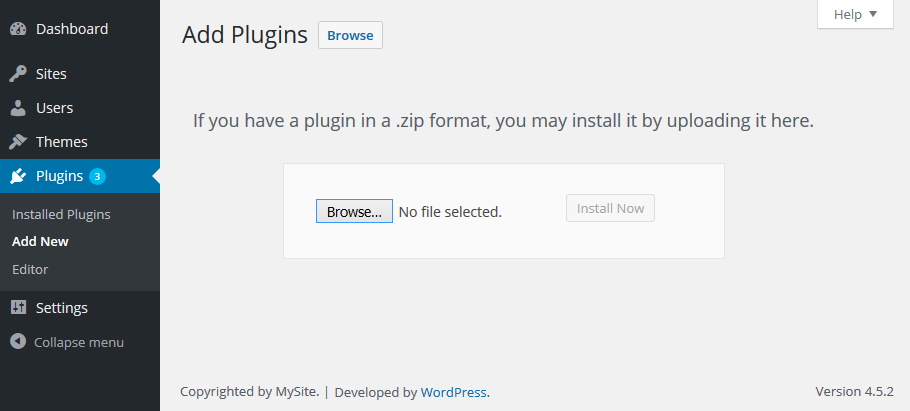
Go to “Plugins” > “Add New” and press “Upload Plugin” button.
Browse the plugin archive and click “Install Now”
After the installation is complete click “Activate” link (Plugins > Installed Plugins).
More info about plugins installation can be found in WordPress Codex.
Common issues
Wrong permissions set for WordPress files & directories.
Not enough memory limit on a webserver.
2. General Settings
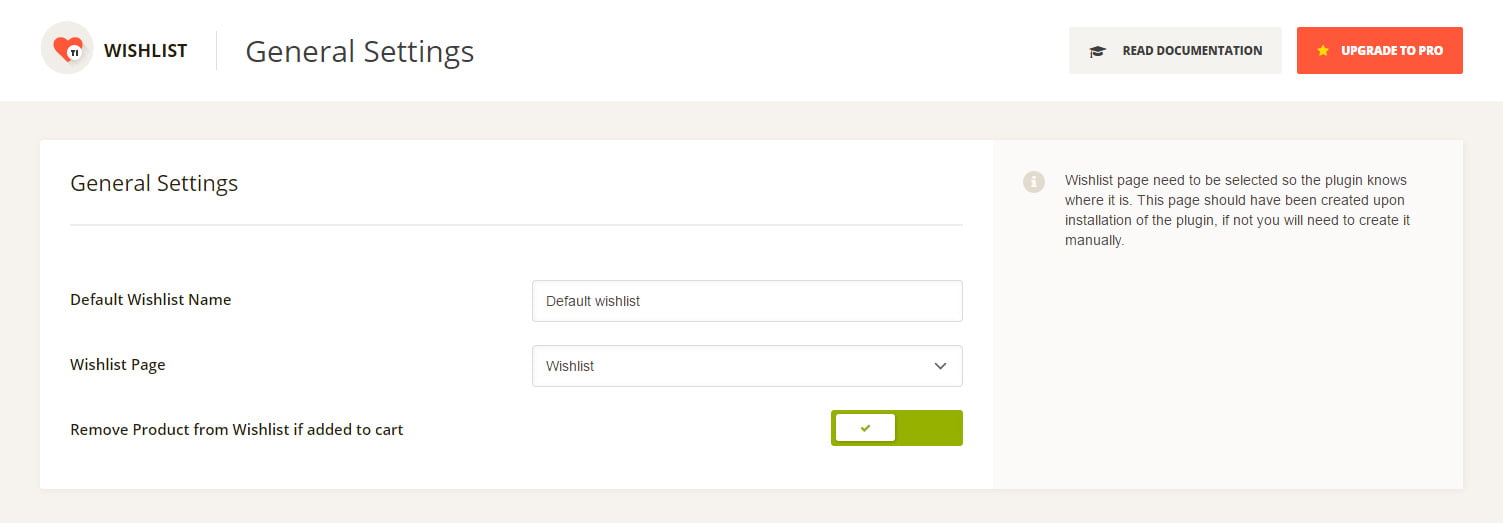
Default Wishlist Name – here you can set what wishlist name the users will see by default. (See image below).
Wishlist Page – Wishlist page need to be selected so the plugin knows where it is. This page should have been created upon installation of the plugin, if not you will need to create it manually.
Wishlist page is a usual page with wishlist shortcode, so you can add any additional content to this page if you need. Or you can create any page and place wishlist shortcode there. Then simply choose this page as Wishlist page.
Wishlist page shortcode: [ti_wishlistsview]
Remove Product from Wishlist if added to cart – if this option is enabled, the product will be automatically removed from the users wishlist once it is added to cart.
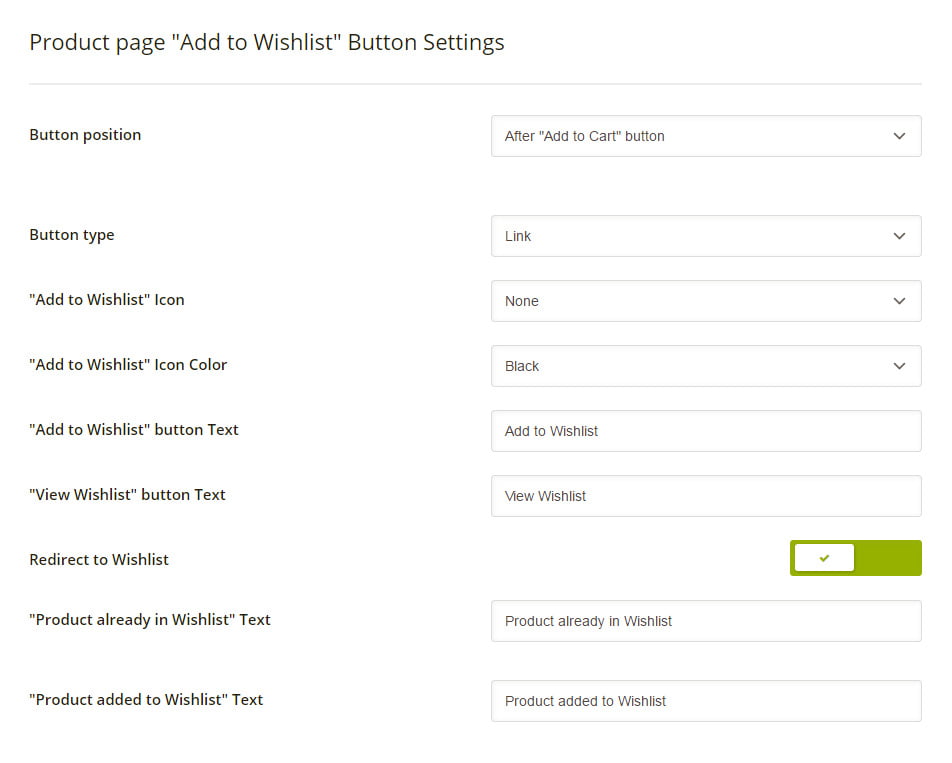
Button position – allows you to set position of the “Add to wishlist” button on a single product page.
*If you choose “Custom Position with code” option, you will have the ability to add the “Add to wishlist” button using the shortcode anywhere in a product content section. You can also put this shortcode at any page/post of your website.
Shortcode: [ti_wishlists_addtowishlist product_id="70" variation_id="0"]
You will need to add your product ID and Variation ID for variable products.
To find the ID head to Products in your admin panel and then hover over the product you need the ID for. You’ll see the product ID number right there.

Button type – option applies how “Add to wishlist” will be displayed as a button or a link
“Add to Wishlist” Icon – here you can enable/disable the icon before the “Add to wishlist” button or even upload your custom icon. Icon will be scaled to 14×14 px. Using the icons with larger dimensions may require additional styling to fit the button.
“Add to Wishlist” Text – you can change add to wishlist button text here.
When you click Add to Wishlist button a popup with success or error message appears. You can adjust message and buttons text for this popups with following options.
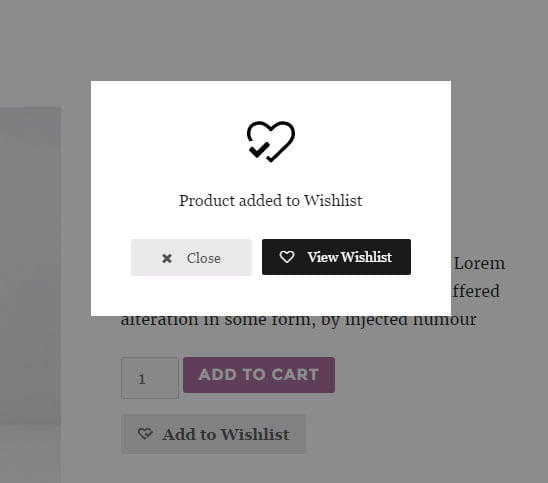
* Example of popup with succes message
“View Wishlist” Text – here you can put your custom text that will be displayed in a popup before and after adding the product into wishlist.
“Product already in Wishlist” Text & “Product added to Wishlist” Text – you can adjust success and error message for Add to Wishlist button.
Redirect to Wishlist – if this option is enabled, you will be redirected to a wishlist page after the product was added in 5 seconds
* Below you can see images with sample button options variations in admin panel and on frontend.
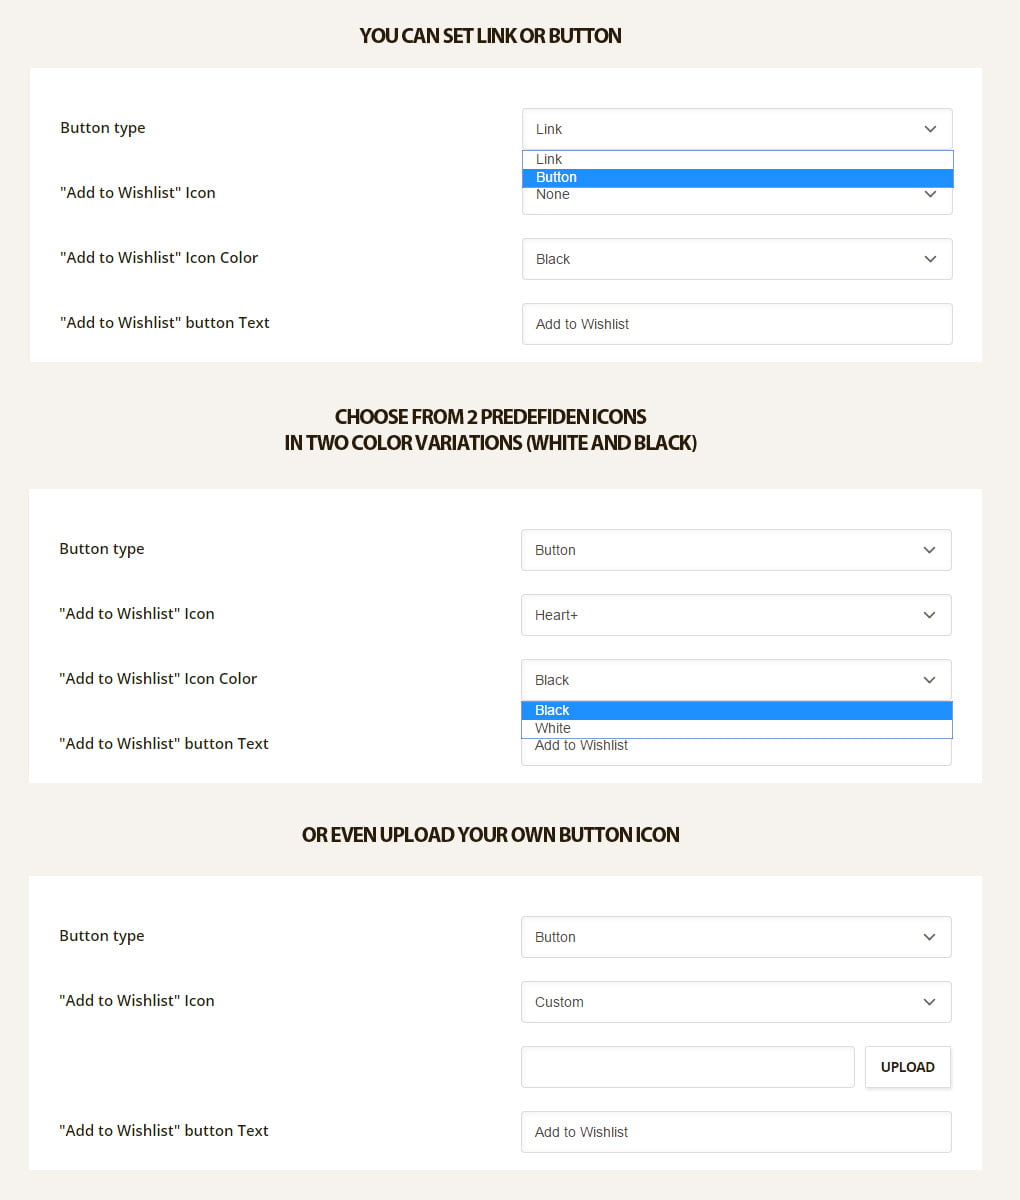
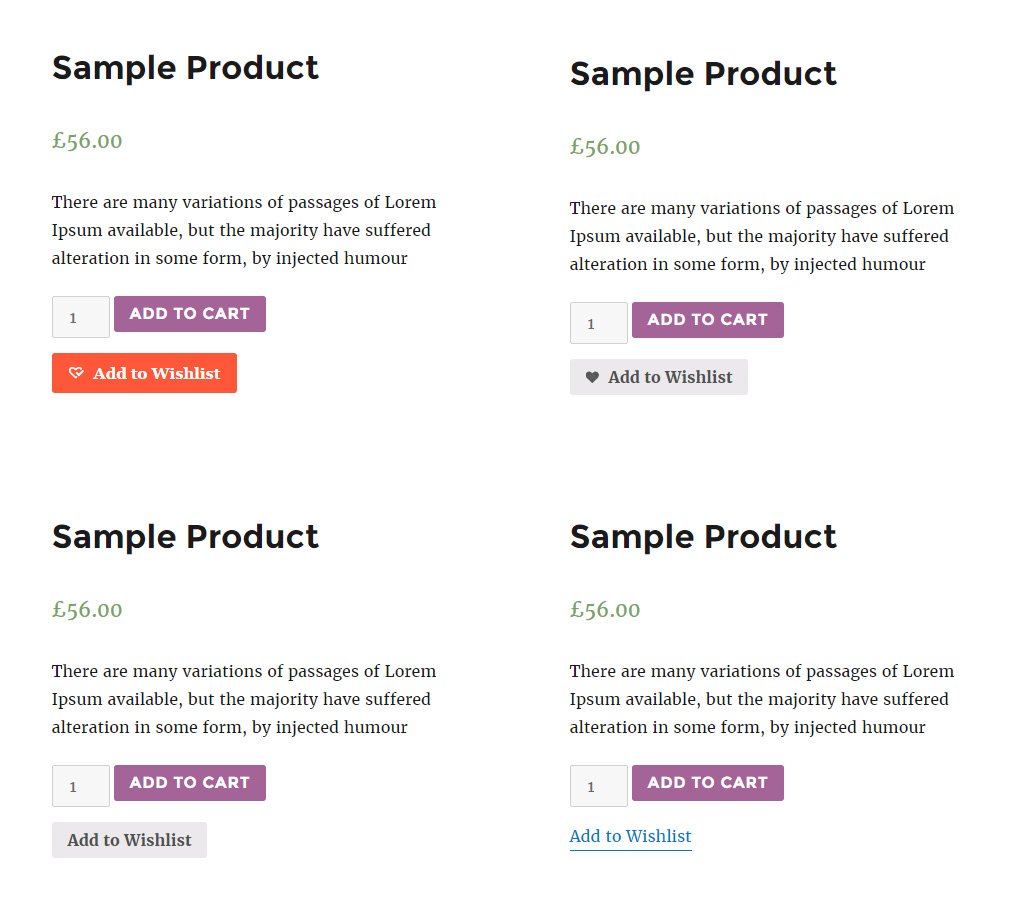
* The look of “Add to Wishlist” button on frontend with different settings
4. Wishlist Product Settings
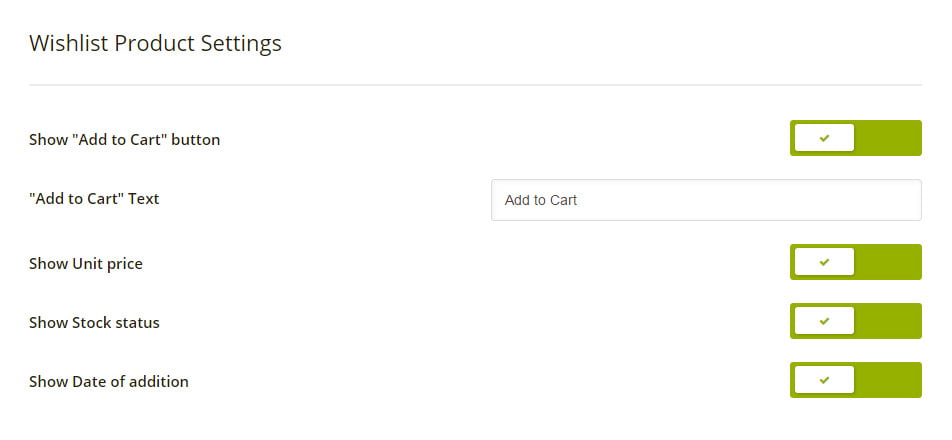
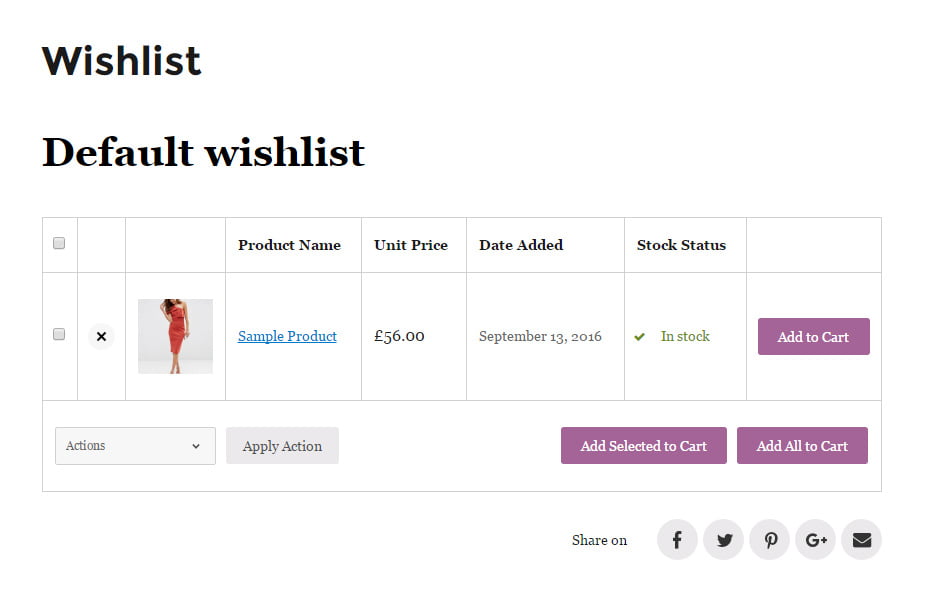
You can choose what kind of information to show in wishlist page table. So you can make your wishlist page simple or informative.
You can see screenshots of wishlist table with different product and table settings below.
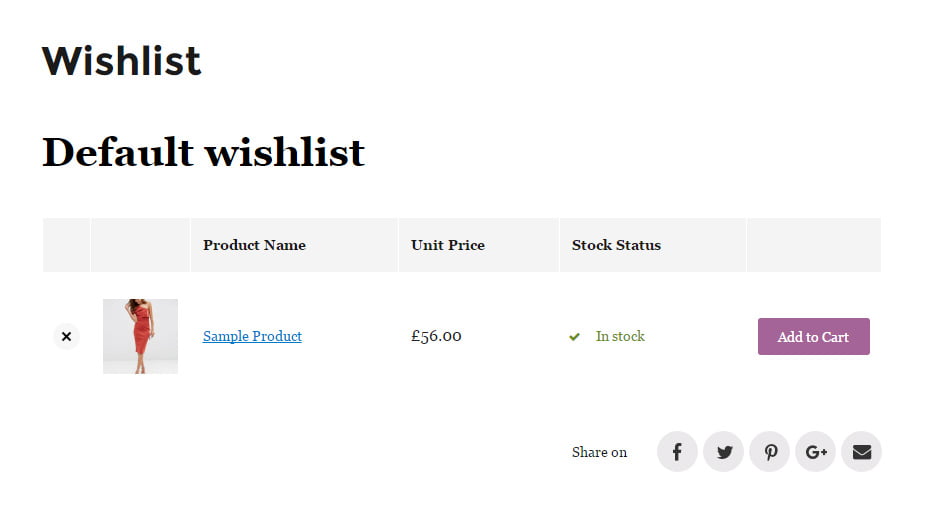
* Simple wishlist table (turned off bulk actions and buttons, checkboxes and date of addition)

* Complete wishlist table (all options are turned on)



6. Social Networks Sharing Options